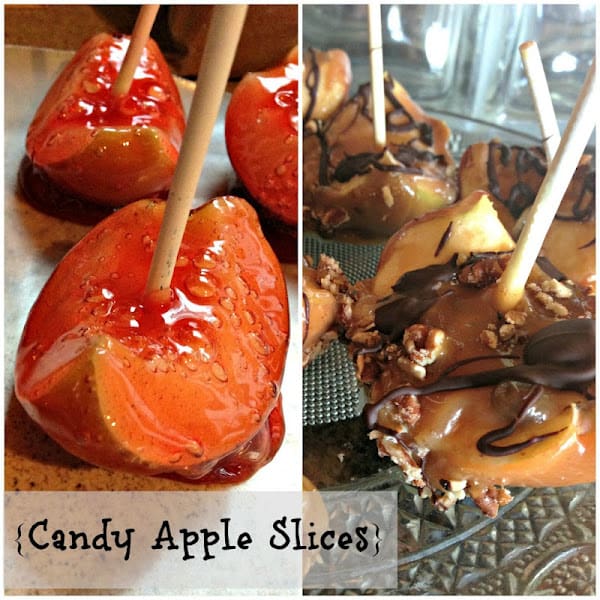
How to Make Irresistible Candy and Caramel Apple Slices
When I was a child, I loved the time of year when my mom made candy apples. Seeing the bright shiny candy coating surrounding the apple was so exciting. They looked so pretty! I could hardly wait to bite into one. When I got past the yummy candy and I was left with the apple, I was left with the biggest apple ever to eat. I didn’t really want the apple, I just wanted the candy part. Does anybody else know what I’m talking about?
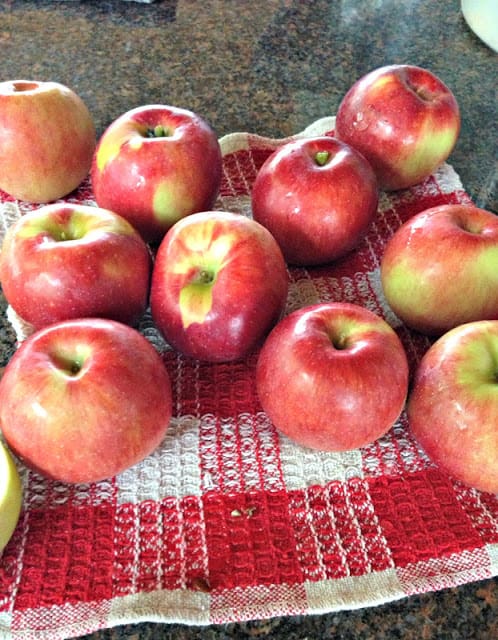
This past weekend, we went apple picking at one of our local orchards. Besides making apple sauce, and apple crisp and just eating them, I also wanted to try my hand at making candy apples. Not just regular candy apples though, candy apple slices. Bite-sized pieces of goodness. No more boring apple to get through!
I decided to make both caramel apples and candy apples.
Also Read:
How to Make Irresistible Candy and Caramel Apple Slices
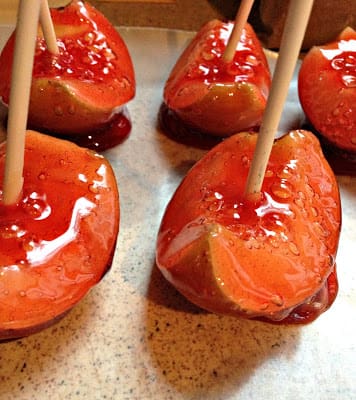
After washing the apples, I cut them up into small chunks. I broke in half the white candy sticks that you can buy at any bulk foods store and stuck them into the top of the apple slices.

Making Candy Apples
- You will need:
- 5 apples (I used Empire), washed, cored, and sliced into big chunks
- Candy sticks
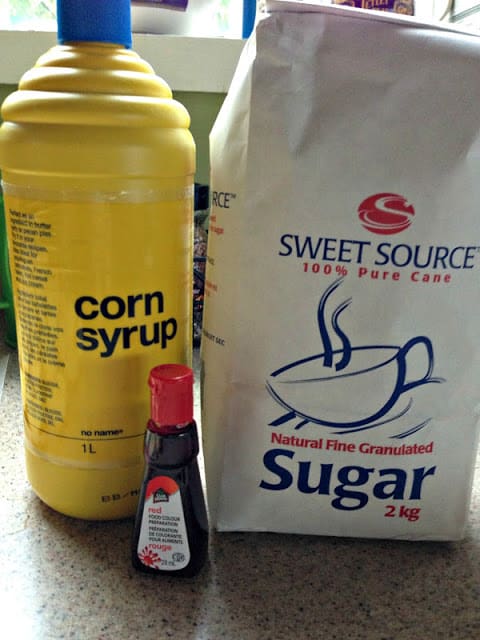
- 2 cups white sugar
- 1cup light corn syrup
- 1 ½ cups water
- red food coloring
Before you put your newly dipped candy apples onto a cookie sheet or wax paper, you will want to grease them first. Believe me. I have learned from experience.
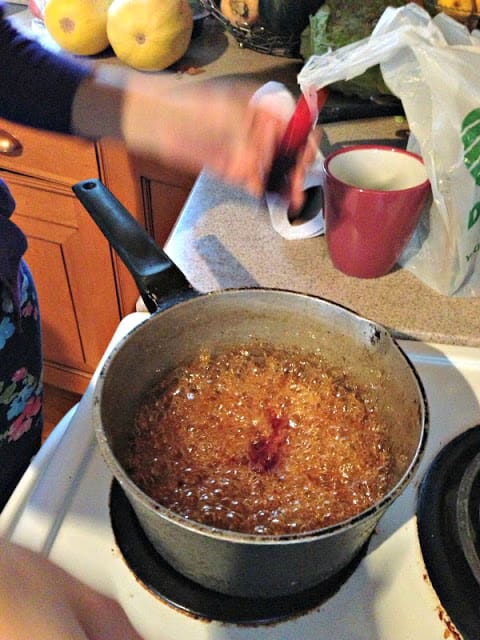
In a heavy-bottomed pot, heat the sugar, corn syrup, and water on medium-high heat. Place your candy thermometer into the pot, but make sure that it doesn’t touch the bottom or else it might crack.
Heat to 300 to 310 degrees F (149 to 154 degrees C), or if you don’t have a candy thermometer, you will know that it’s done when you drop a small drop of syrup into cold water and it hardens. This part took about 20 minutes.
Remove from heat and stir in about eight drops of red food colouring.
Then comes the fun part of dipping your slices into the syrup, making sure the slices are evenly covered, and place on your greased surface to harden.
Now to the Caramel Apples!
These do have more ingredients, but I found that they were easier (meaning faster) to make.
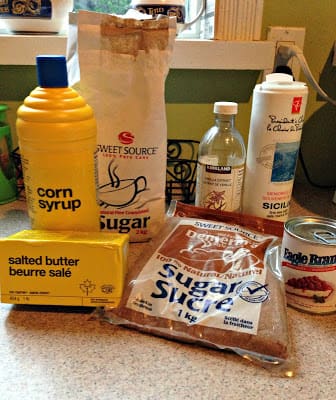
- You will need:
- 5-6 apples (again, I used Empire), washed, cored, and sliced into big chunks
- Candy sticks
- 1 cup granulated sugar
- 1 cup brown sugar
- ¾ cup butter
- 1 can of sweetened condensed milk
- 2/3 cup corn syrup
- ¼ tsp salt
- 2 tsp vanilla
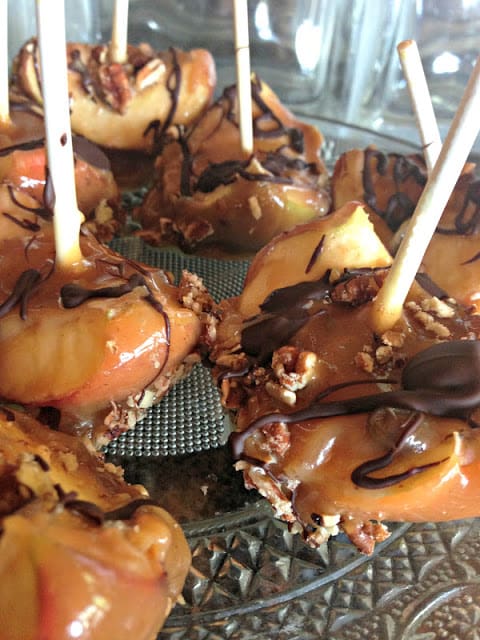
If you decide to make them a little fancier: toasted almonds or pecans, bittersweet chocolate, or any other toppings that you choose.
Again, grease the cookie sheet or wax paper so your apples don’t stick to the surface as they harden.
Suggested Content:
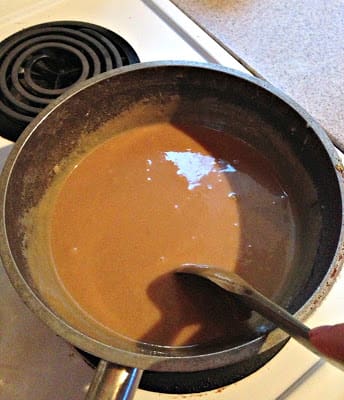
Grab your heavy-bottomed saucepan again and stir together sugars, butter, condensed milk, corn syrup, and salt. While stirring constantly to keep the caramel from burning, bring to a boil over medium-high heat.
Reduce the heat to medium-low and keep stirring until the mixture thickens to a deep caramel color or until your candy thermometer reads 234-236 degrees F (112-113 degrees C). Remove the caramel from the heat and stir in the vanilla. Let it cool for 5 minutes, while you chop up the nuts.
Dip the apple slices into the caramel and let the extra caramel drip back into the saucepan. Sprinkle the nuts on top, on the sides, or on the bottom. I liked the look of sprinkled on top.
Resist the urge to eat them right away, and put them in the fridge for 15 minutes for the caramel to set.
If you want, you can then drizzle the slices with melted chocolate. Again, you do have to put them back into the fridge for at least 30 minutes or up to 24 hours. Believe me. It will be worth it when you bite into one of these little apples.
I love that you don’t have to commit to a full apple, which can be overwhelming for young ones. Have a small slice and you are set to go (and then have a few more!). (Candy apple recipe adapted from allrecipes.com, Caramel apple recipe adapted from Canadian Living. Don’t forget to check out Heidi’s blog and say “hi”!)
Note from Kalleigh: This is a guest post by my friend Heidi from It’s Our Pinteresting Life, where she and 2 of her sisters share their favorite recipes, crafty exploits, and DIY adventures. Please swing by their blog and leave a comment over there to let these creative ladies know they are doing a great job! Thanks!