How to Recover a Lampshade Like a Pro
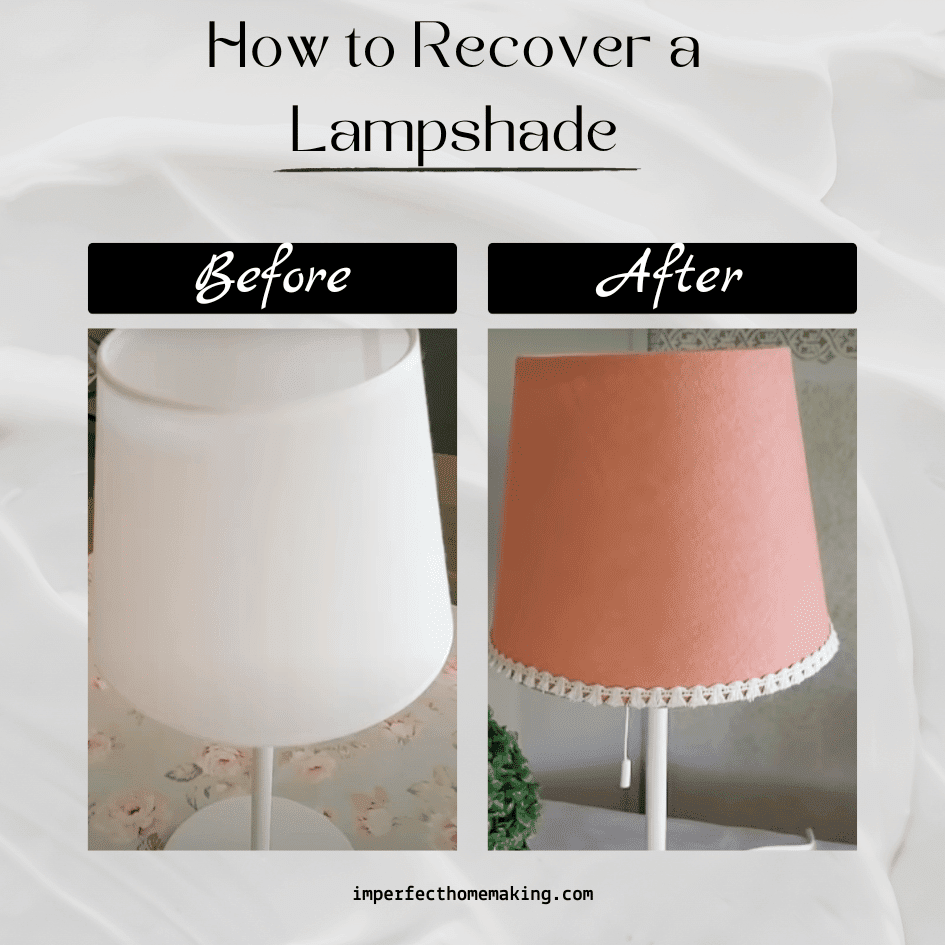
Now, you can breathe new life into your old lampshade with our comprehensive guide to lampshade recovery. This DIY project on how to recover a lampshade is a fantastic way to add a personal touch to your home decor. Let’s get started on transforming your lighting fixtures into pieces of art that radiate elegance and charm.
Table of Contents
Materials Needed for Lampshade Fabric Replacement
Let’s dive into this quick and easy guide to give your lampshade a fabulous makeover. Here is a list of items that you will need for this project.
- An old lampshade (mine was a $2 thrift store find)
- Spray adhesive
- Glue gun and glue sticks
- Fabric of your choice
- Ribbon
- Scissors
Recommended Reading:
- How to Make Seedling Pots from Newspaper
- How to Make Stockings from Old Sweaters
- How to Transform an Old Door into a Table
DIY Lampshade Recovery Step-by-Step Guide:
Deconstruct the Lampshade: Begin this DIY project by assessing the condition of your lampshade. If it’s simple and in good condition, you might just cover the old fabric. Otherwise, remove all trims and the current fabric, leaving a plastic or cardboard base and possibly a metal frame.
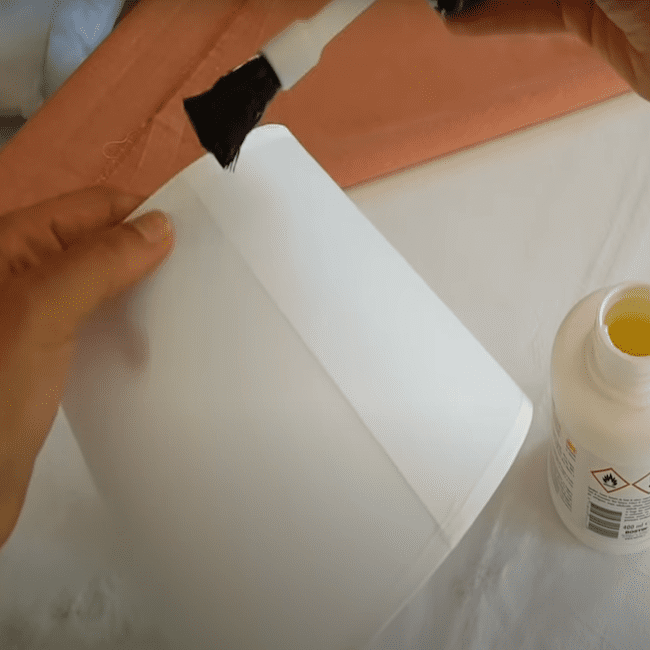
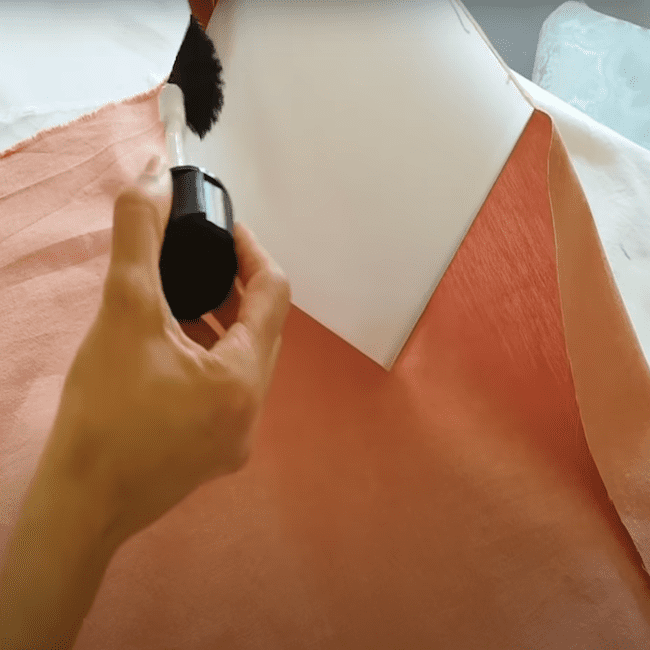
Prepare the Fabric: This step is all about precision. Roll the lampshade on the fabric to measure enough coverage. Then, starting at the seam, spray the lampshade with adhesive and roll it on the fabric, ensuring smooth adherence. Overlap the fabric slightly at the seam for a seamless look.
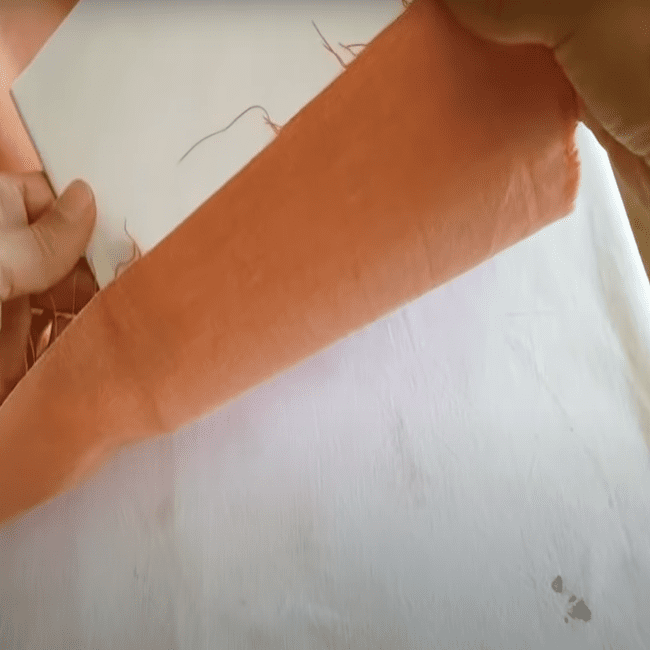
Trim the Fabric: Make sure to leave some extra fabric at the top and the bottom for folding over. This excess will be crucial for neatly tucking and folding.
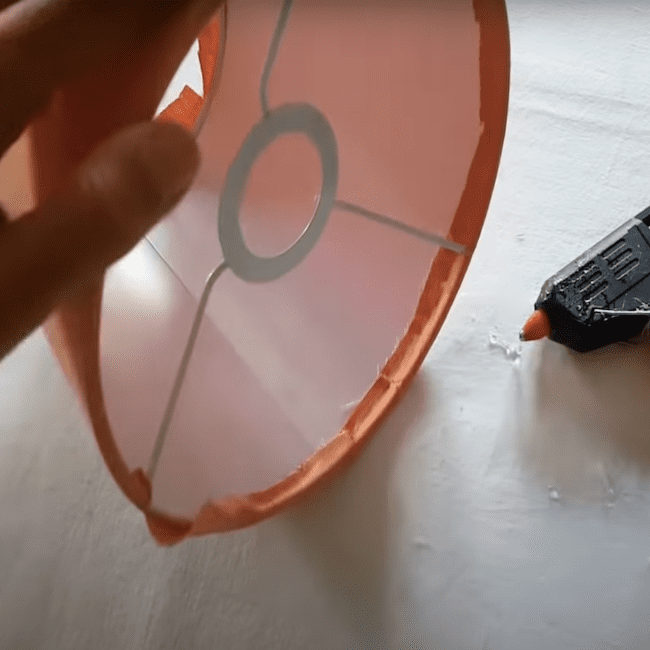
Reattach the Metal Frame: If detached, use a hot glue gun to re-attach the metal frame.
Create a Neat Seam: Fold and glue the fabric at the back for a tidy seam. This step is crucial for a professional-looking finish.
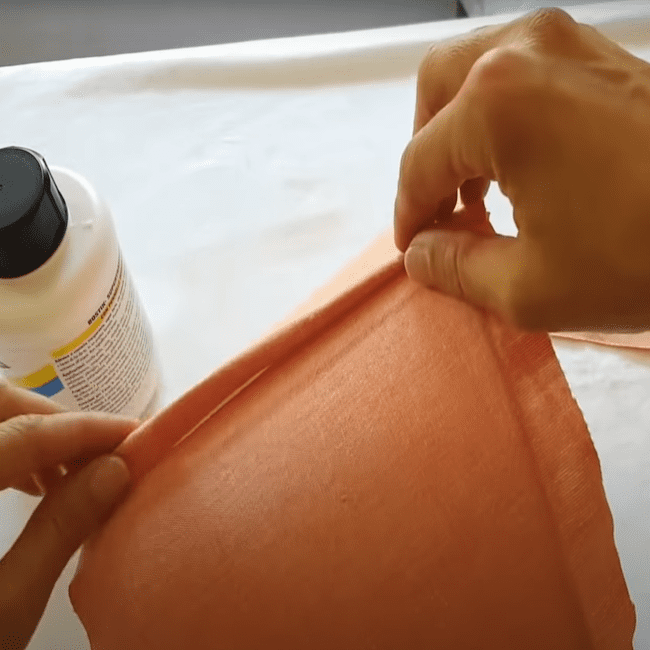
Secure the Edges: Spray the extra fabric at the top and bottom with adhesive, fold it into the lampshade, and secure it with clothespins until dry. Make slits in the fabric as needed for a neat fold.
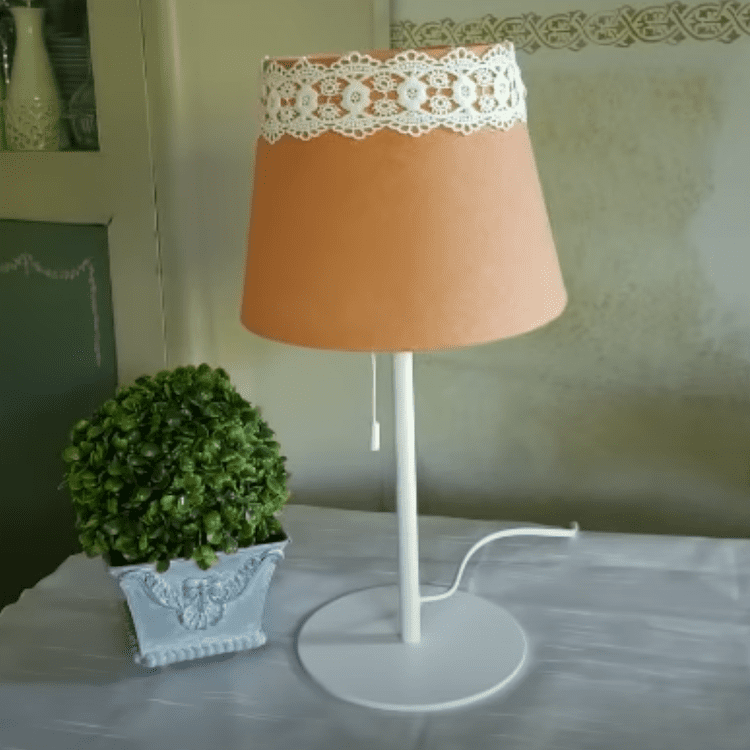
Add Finishing Touches: Optionally, add ribbons, lace, pom-poms, or fabric flowers around the inside for a finished look. Decorate as desired; I added a simple white lace around the top of my lampshade, as demonstrated by the picture below.
How to Recover a Lampshade FAQs
What type of fabric is best for recovering a lampshade?
For recovering a lampshade, it’s best to stick with light to medium-weight fabrics. Think cotton, linen, or silk. You want something that’s not too thick so it lets light filter through, but also easy to handle.
Can I use any old lampshade for this project?
And about using an old lampshade – absolutely, go for it! Just make sure it’s still sturdy. Things like faded fabric or a bit of loose trim aren’t a problem since you’re going to cover them anyway.
How do I measure the amount of fabric needed?
Roll the lampshade along the fabric, starting and ending at the seam, to ensure full coverage. Add a few extra inches for overlap and to tuck in at the ends.
Do I need to remove the old fabric from the lampshade?
It depends on the condition. If the old fabric is smooth and flat, you can cover it directly. However, if it’s damaged or lumpy, it’s best to remove it for a cleaner finish.
Can I add embellishments to my recovered lampshade?
Yes, feel free to personalize! Ribbons, lace, pom-poms, fabric flowers – all these add a unique flair. Just make sure whatever you add is secure and safe.
Conclusion
So there you have it, a gorgeous new lampshade that’ll brighten up any room, from nurseries to living rooms. This project is an excellent way to upcycle and inject personality into your home.
A little tip from my own experience – be careful with the spray adhesive. It’s easy to get carried away and end up in a sticky situation, like my phone found out!
For more creative DIY projects and tips, feel free to follow me on X for more creative ideas. Also, I always appreciate your comments and ideas!


Adorable lampshade! You have great ideas.
That looks great! Can’t wait to to do my own 🙂
Bling-a-holic’s rejoice!! One more uplifted drab shade! Stopped by from Tip Junkie blog hop- I did a shade this week as well…..ahh, the great crafty minds at work. Stop by, say ‘Hi’- and oh btw- great job! Can’t wait to try this one as well 😀
So adorable! I love how simple it looks. I just got some new lampshades last weekend (for free) maybe I’ll give this a try.
Can’t believe the first tutorial I find is for the exact same lampshade I’m redoing. However, mine is so old the stiff plastic “lining” crumbled to bits when removing the fabric. Think mine will be a little bit more work. LOL
Lady, you are amazing! Been scrolling through your diy and wow….are you productive and inspired! And inspiring also…but i fear that as much as i love to start projects, i have difficulties terminating them. So no starting new ones until i finish at least one of the existing..
Thanks for a very nice blog
Laura in Sweden
That is adorable! I love the transformation. Thanks for linking to Home Decor and Organizing Link Party.